SF Cyclotouring

Ride reports and other ramblings from a San Francisco cyclist.

6/28/2015

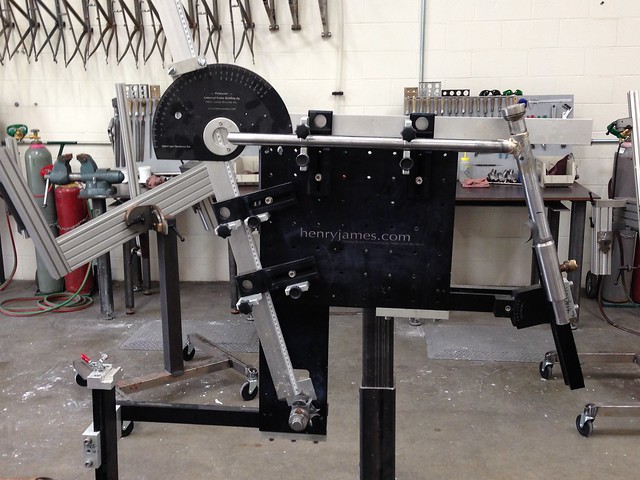
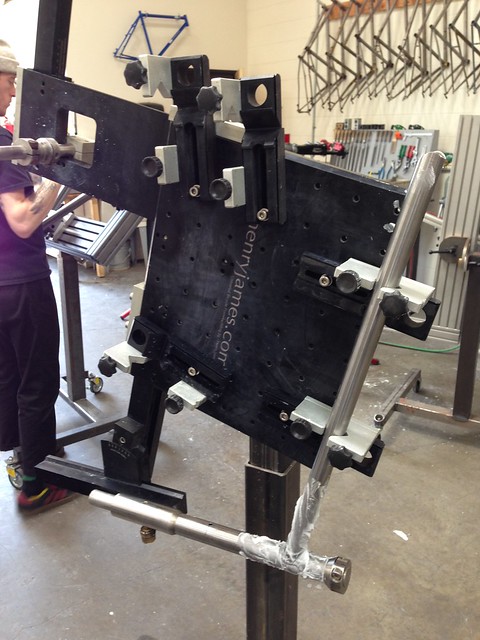
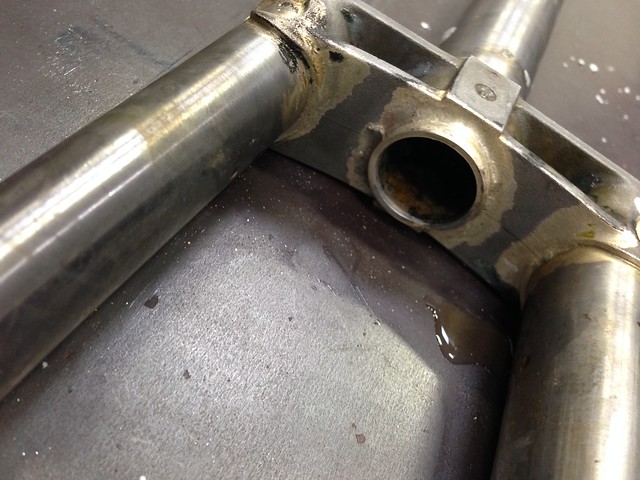
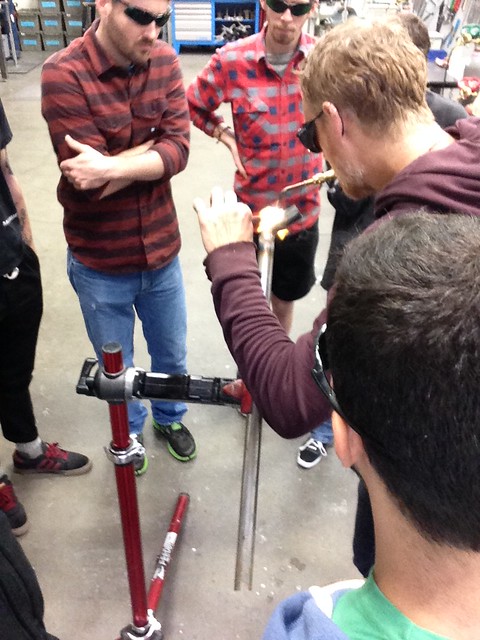
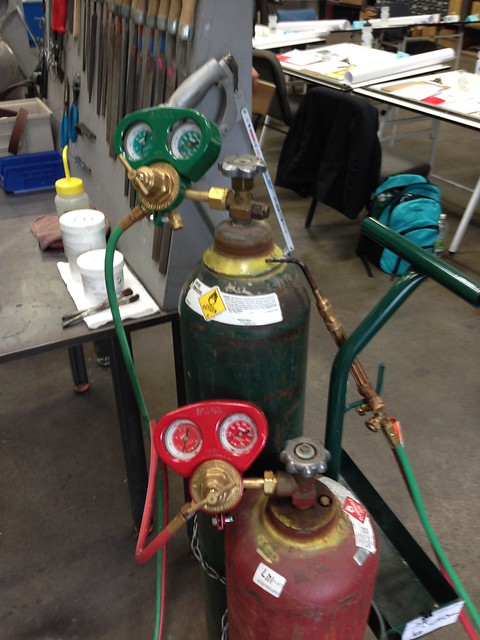
Adusting an Oxy/Propane Torch Flame

Just found this good description at http://weldingweb.com/showthread.php?260681-Oxy-propane-neutral-flame&s=befe41b455db6bd0a0d81000b461b614&p=2599701#post2599701 -- putting it here to share and bookmark.


Setting a flame with propane is not as difficult as most people make it. It is different than acetylene though. You open your fuel and light it, adjusting until you get a stable flame pushing out of the torch. Then you slowly open your oxygen. The flame can be judged based on the shape and color of the inner primary flame (or flames for a rosebud). When the primary flame is long and has a feathered border, it's reducing. As the primary flame becomes short and well-defined, it is neutral. The oxidizing flame looks really similar to a neutral flame, except the difference is that the oxidizing flame will have a slightly shorter primary flame and the primary flame will become a brighter/lighter (whiter) color blue. 

Practice going through the full range of reducing, neutral, and oxidizing while slowly turning the oxygen knob a few times. You'll get the hang of it.

Once you know how to judge the oxy/fuel ratio - it's just a matter of getting used to setting the fuel flow high or low enough with the torch knob so that the flame is stable (not pushed too far from the torch, and on a rosebud, there will be a ring formed by the back ends of all the primary flames) but is pushed out from the torch tip enough so the combustion is happening outside the tip.

Setting a propane flame should not take any more time than an acetylene flame.

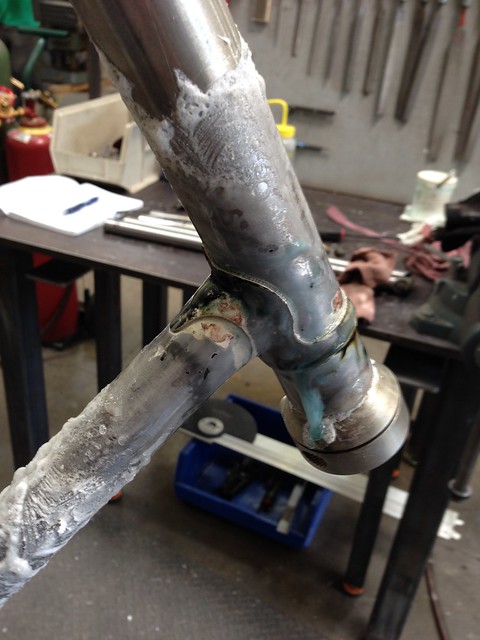
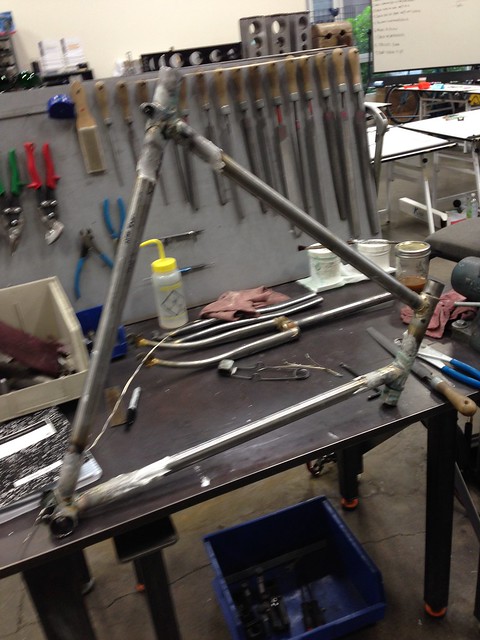
I don't use oxy/fuel cutting equipment. I mainly stick to oxy/propane brazing with single flame and multi flame nozzles. Always read your entire equipment manual in case there's something special about adjusting your cutting torch. If you don't have a copy, you can find most online.

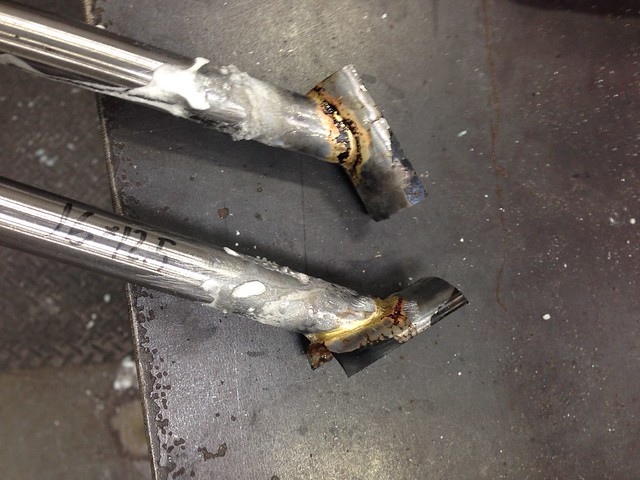
Also, remember that in acetylene, the primary flame has lots of BTUs of heat, so people are used to applying the primary flame to the work. In propane, the secondary flame has all the BTUs of heat, so you want to apply the secondary flame to your work surface to really apply some heat. Lots of people make the mistake of treating a propane flame like the primary flame of acetylene, they put the propane flame too close to the work, and they come away with a bad experience where they think propane is lacking in heating power. Propane has a large and high BTU secondary flame which is great for applying lots of even heat to chunky assemblies - which is great for brazing or preheating for cutting on thicker metal.

6/14/2015

UBI Framebuilding Class - Day 10


5/22/2015 - Day 10

UBI

UBI

UBI
  • Final bench/workarea cleanup
  • Minor frame cleanup
  • Packing and Boxing frame for shipping
  • Graduation & Course Certificates

UBI Framebuilding Class - Day 9

5/21/2015 - Day 9

UBI

UBI

UBI
  • Final Frame Machining
    • Heat distorts tubes - makes them non-round
      • Back of HT at top and down tubes
      • BB at chainstays
      • Need to ream/rethread with special tools
    • CAUTION: Use lots of cutting fluid
    • Seat Tube Reaming
      • CAUTION: Turn clockwise only!
      • Work over a workbench to protect the cutting tool (in case you drop it)
      • Never lay the tool down on a hard surface
      • Brush off the chips on the cutter blades
      • CAUTION: very sharp teeth/blades!
      • Check for burs, remove with file
      • Test with a known-good seatpost.  If it fits, you don't need to do anything else
      • Don't clamp frame by the seat tube, but clamp on TT as close to the working area as possible
      • The ST reamer is adjustable: measure diameter of reamer, start at 27.0mm
      • Seat tube should be horizontal, which helps prevent the reamer from falling down inside your frame
      • Put a rag or bucket on floor under the work area to catch chips and fluid
      • Put cutting fluid in ST and on reamer blades
      • REMEMBER: turn clockwise only
      • Do this step BEFORE cutting the seat tube slot
    • Head Tube Chasing and Facing (Park Tools)
      • Choose the right size of cutter (1 vs 1-1/8 inch)
      • Do top first
      • Headtube should be vertical
      • Position centering cone at bottom of HT
      • Debur both top and bottom of HT
      • Install the lower cone and bearing, then the spring, then the locking collar
      • Tighten just enough to remove any slop in tool, THEN add two full turns on collar
      • CAUTION: only turn tool clockwise
      • Adjust by 1/2 turns as needed
      • Remove all silver and cut into steel
      • Don't push down on the tool
      • Examine chips for silver vs. steel
      • Turn tool slowly
      • Release tension and keep turning before removing the tool to prevent chatter marks
      • Check for an even cut across top of head tube (at least 75% around)
      • Turn tool with both hands to ensure an even cut
      • NOTE: Debur HT after cutting operation
    • BB Chasing and Facing
      • First drill BB cable guide
        • Tap a 5mm hole, use #19 drill bit
        • Locate guide with derailleur cable strung from shifter boss to rear cable stop
        • Pay extra attention with curved stays to avoid impinging on chainring and/or tire clearance
      • Clean out BB; remove flux and dirt and excess silver
      • CAUTION: Watch for left and right threading
      • CAUTION: Stop if there's any binding
      • Turn both sides of tool in same direction to start (top handles towards rear of bike)
      • Once there's good purchase, you can focus on one side
      • High-pitched squeal means you're cutting into silver
      • Continue until cutter is buried in BB shell, plus 1mm
      • Remember to reverse tool a quarter turn for each cutting revolution
      • Remove non-drive handle
      • Replace with facing handle
      • Control cutting pressure with 6mm allen key
      • Cutter stays in BB shell
      • Switch sides - watch center post
      • Repeat facing operation
      • Replace cutting handle
      • Remove cutting tools slowly
    • Fork crown facing
      • CAREFULLY clamp fork crown in vise with blades facing out away from workbench
      • CAUTION: There are two sizes of 1-inch crowns: NJS (27.0mm)  or ISO (26.4mm)
      • Use Park facing tool
        • Cap on top
        • Collet inside
          • Black for 1 inch
          • Blue for 1-1/8 inch
        • Tighten cap to center collet
        • Put cutting fluid on blades
        • Tighten cap to remove any wobble
        • CAUTION: only turn tool clockwise
        • Feel for a change in cutting action (silver vs. steel)
        • Use even downward pressure with both hands
        • Check for an even cut (at least 75% around)
  • Alignment Table
    • Mount frame onto BB Post
    • Check w/Surface Gauge
      • ST at BB
      • ST at TT
      • HT at DT
      • HT at TT
    • Check w/V-gauge at HT, ST, and rear dropouts

UBI Framebuilding Class - Day 8

5/20/2015 - Day 8

UBI

UBI

UBI

UBI
  • Seat/Chainstay Bridges
    • Dimensions needed for mitering on the mill
      • angle
      • miter length at bottom,
      • tubing diameter
    • If caliper brakes: chainstay bridge height = BSD/2 - 6mm (for dummy axle) + 45mm (for brake reach)
    • For canti or disk brakes, position bridges similar to fork-crown clearance (365mm on my frame)
    • If using seat stay bridge reinforcements, subtract 3mm from miter length
    • Use 0.5-inch diameter tubing for seat stay bridge
    • Use 5/8-inch diameter tubing for chain stay bridge
    • Scribe center line to establish locations for any drilled holes
    • Rough cut - measure across bottom of brake bridge, add 1 seatstay diameter to length
    • Seat stay bridge dimensions
      • SS Angle: 11° or 5.5° bisected
      • Miter length along bottom: 65mm - 3mm (for reinforcements) = 62mm
      • SS Diameter: 16mm
      • Rough cut length: 62 + 16 = 78mm
    • Chain stay bridge dimensions
      • CS Angle: 19° or 9.5° bisected
      • Miter length along bottom: 45mm
      • CS Diameter: oval chainstays? - 30.7mm  (Dan uses 35mm? hole saw for oval stays)
      • Rough cut length: 46 + 16mm = 61mm
  • Water bottle bosses
    • Drilling bottle cage bosses
      • Two different jigs available
      • Use angle drill and 0.25-inch bit
      • CAUTION: Go easy -- don't punch through the other side of the frame tube!
      • Cage position: ~150mm up from BB shell for both ST and DT cages
      • Scribe a centerline on tubes -- use this to align drill holes and any reinforcement stars
    • Brazing bosses
      • Use silver filler
      • Heat the tube until the flux goes clear
      • Brush flame gently onto boss
      • Watch for stopped bubbling
      • Add silver filler
  • Frame Braze Ons
    • Decide which you need
      • Brake type -- rear cable
      • Rear derailleur cable stop
      • Downtube shifter bosses or cable stops
      • Dyno light wire guides
      • Cantilever brake bosses
    • BB Cable Guide
    • Use special braze-on clamps to fixture braze-ons to frame
  • Canti Brake Studs
    • Use Anvil jig
      • Set to 265mm for 650B
      • 75-85mm stud spread
      • Braze with silver filler

UBI Framebuilding Class - Day 7

5/19/2015 - Day 7

UBI

UBI

UBI

UBI

UBI

UBI

UBI
  • Seat Stays
    • Attachment Styles:
      • Traditional
      • Fastback
    • Choosing Seatstays
      • Typical diameters: 14/16/19mm
      • Consider proportions to main frame -- fat tubes with skinny seatstays will look odd, etc.
      • Plug/socket-style dropouts will dictate the SS diameter
      • You will need to cut a tab on your dropout
      • Also need to cut a slot in the SS for the dropout tab
      • Double-tapered SS are useful for canti brakes
      • You can bend your own SS -- use the fork-blade bender
      • Canti brakes -- be aware of SS width vs. canti-boss placement requirements (75-85mm boss spread)
    • SS overview drawing
      • Measure axle to SS contact point
      • Center of axle to end of dropout tab
      • Lay seatstay on drawing, gauge tire clearance
      • For Canti-studs
        • Measure up to the BSD line
        • Boss spread is 75-85mm
        • Draw horizontal line at BSD to estimate boss locations
    • Fitting Seatstays
      • Cut & Slot for Tabbed Dropouts (same technique as CS and fork blades)
      • Bevel inside of drive-side stay more and steeper for cassette/chain clearance
      • Drill vent holes (1/16-inch bit)
    • Brazing Seatstays
      • Always use dummy axle
      • Fixture SSs using spring-thing clamp, leather toestrap, or similar
      • Braze using silver filler at seat lug, brass filler at dropouts -- remember to use the correct flux for each!
      • Braze in a bicycle work stand, not the frame jig, for better access
      • Tack inside points of dropout tab/notch lightly, to avoid lifting the seat stays off of the seat tube
      • Heat edge of dropout tab until red, then "walk" the heat up towards the notch/slot
      • Heat the seat lug, watch for the lug's silver to melt
      • Tack at the tops of SS
    • Seatstay Attachment w/Custom Caps
      • Choosing the material
        • Use flat stock or large-diamter tubing (e.g. fork blade cutoffs)
      • Mitering
        • Choose an angle -- shallower (longer cap) is harder to fit
        • Use bevel gauge to match desired angle of tube clamped in block in bench vise
        • File parallel to floor with half-round or flat file -- depending on the cap material (round or flat)
        • Make stays the same length
        • Minor length adjustments can be made at the opposite slotted end for the dropouts
      • Brazing the Caps
        • Slide cap to just the bottom end of the oval cut into the seat stay
        • Tack bottom with brass
        • Tack at top end
        • Tin brass around -- watching for gaps and pinholes
      • Finishing
        • Remove excess material with any available method (bench grinder, hacksaw, snips)
        • Clamp stay parallel to floor
        • Only file flat
        • Rotate stay, not file
        • Finish file until there's a single shiny line
        • Leave top point 4-5mm long for finish fitting (can do slight wrap-around effect on seat lug)
        • Caution: Do NOT file into the stay
        • Pick desired top point, mark with Sharpie
        • File to point, leaving 4-5mm long
        • Clean off burnt flux, because silver won't stick
        • Use emery cloth on end of seatstay to finish and smooth
      • Fitting to Frame
        • File a groove with a round file in seatstay lug pointing in direction of seatstay dropout tab
        • Locate groove by inking seat lug with Sharpie and scribing seat stay along lug to mark the seat lug
        • Choose desired landing point for seatstay -- into the lug's "valley" is typical
        • File GENTLY; watch that scratch marks from file are centerd over scribed marks
        • STOP if you hit silver, do NOT go deeper

UBI Framebuilding Class - Day 6


5/18/2015 - Day 6

UBI

UBI

UBI
  • After Brazing Main Triangle
    • Examine the frame for any imperfections or needed touch-up -- mark these with Sharpie
    • Inspect inside BB for silver penetration
    • Too much silver needs to be removed by filing out with an appropriately-sized half-round file
  • Chainstay Mitering
    • Rough-cut to ~15mm extra at BB end to allow for miter
    • CAUTION: do NOT rough cut chain stays to the back-of-BB length!
    • Get 132mm dummy axle, mount stays onto axle
    • Put subassembly on drawing, mark CS tube length at back of BB shell
    • Record the axle-to-back of BB measurement
    • Set a caliper to the BB socket width
    • CS Mitering done with 35mm hole saw, to match inside ID of BB shell
    • Fillet-brazed bikes often have the chain stays offset lower to the BB to provide some clearance for the ST braze
    • Lugged bikes have the chain stays lined up directly, not offset
    • Miter on milling machine
  • Chainstay Fitting
    • Clean off burs from CS end
    • Clean out BB ports with files and emery cloth
    • Resize oval end of CS to fit BB port (squish in bench vise)
    • Take length above BB (38mm) along seat tube ~500mm
    • Triangulate on frame to determine CS angle/height
    • Scribe line on edge of seat tube
    • Check for free movement to desired position - file BB ports as needed
    • Fillet-brazed frames need vent holes in chainstays & BB shell
  • Chainstay Brazing
    • Set up in jig
      • Leave CS shy of inside BB port by 1mm to allow a ledge for silver filter to collect (otherwise it runs inside onto BB threads)
      • Mark outside of chaintsays
      • Set jig to correct BB drop
      • Tighten center bolt of CS boom on jig first
      • Check inside BB with flashlight to ensure proper CS position (leaving 1mm ledge)
      • Check CS socket points on BB shell, use punches to tighten up ports as needed
    • Brazing
      • Flux inside and out, careful of the BB threads
      • Flux halfway around the ST
      • Paint extra flux up the chainstays (which will be pointing UP when brazing)
      • Focus heat on BB since it's thickest
      • Start on non-drive side
      • Heat seam of port on BB
      • Make sure BB stays hot since silver filler needs to flow there
  • Frame Alignment
    • Rear Dropouts
      • Use Calipers to check OLD measurement 
      • Use H-tools for dropout alignment
      • Use long length of flat stock placed under BB and under H-tool to check for even dropout height
      • Use known-good wheel to check for rear triangle alignment
      • Use frame alignment gauge (Park FAG-1 or similar)
      • Check for even spacing at top of rim with long flat stock along main triangle
    • Assess overall alignment picture
    • Make a plan to correct alignment
    • Bend chainstays to correct

UBI Framebuilding Class - Day 5

5/15/2015 - Day 5

UBI: picking frame tubes

UBI

UBI

UBI

UBI

UBI
  • Frame Tubing
    • Choosing Frame Tubes
      • 8/5/8 is OK to use
      • Wall thickness
      • Overall length of tube should reach to at least halfway across adjacent tubes
    • Check seat tube with actual seat post to ensure fit and determine butted/non-butted ends
    • Locate tube butting (look inside)
      • Watch for short vs. long butts
      • Bias long tube butts towards the headtube
    • Mark tubes just past center of adjacent tube
    • Label tubes and their orientation
  • Machining Dimensions (see worksheet)
    • TT/ST: 73°/17°
    • TT Miter Length: inside corner to inside corner
    • TT/HT: 73°/17°
    • Notch ST for Lugged BB, Notch DT for Fillet-brazed BB
  • Tube Mitering 
    • On the Milling Machine
      • Diameter of Cutting Tool/384 = approximate cutting RPM
    • By Hand (specific to TT/HT Joint, others similar)
      • Only rough-cut one end
      • Scribe to inside of headlug
      • Use Bevel Protractor/angle gauge set to HT/TT angle as filing guide
      • Cut miter and file
      • Clean out inside of tube (file/emery cloth)
    • Scribe mark down length of HT for vent hole locations
    • Drill 0.25-inch hole (#3 drill bit)
  • Henry James Jig Set-up (specific to HT/TT)
    • Level out the TT blocks against the jig's backplate with provided angle-iron
    • Set centerlines for TT
      • Adjust lower blocks first
      • Adjust upper V-blocks next
    • Set Head Angle -- watch for loose gauge block
    • Head Tube Rod - put HT on
    • Head Tube Height Adjustment
      • Align HT vent hole with TT
      • Check HT height from drawing
    • Rock tubes in lug to ensure they're fully seated
    • Make sure all clamp bolts are tight
  • HT/TT Brazing
    • Silver flux everything
    • Rotate jig to expose obtuse angle of tubing/lug joint
    • Tack obtuse angle
    • Tack acute angle
    • Follow brazing sequence to complete lug braze
    • "Paint" with torch flame to move the silver where you want it to go
  • Seat Tube
    • Notched for lugged frames to locate tube in BB
    • Locate ST in BB and lay on drawing to locate ST/TT vent hole
    • Check BB port angle against drawing
  • Brazing the Frame
    • Mount tubes in Henry James jig
      • Ask instructor for help
      • Flux everything
    • Brazing
      • Remember: Obtuse angles first
      • Tip jig to point joint downwards to leverage gravity
      • Use soft reducing flame, barely roaring
      • Start w/HT/DT lug, braze similar to HT/TT lug 
      • Move to BB (rotate jig)
        • Do obtuse/bottom/outside angle first
        • Then do back/acute angle
        • Don't cook CS ports
        • FEed fillter at DT, look for it at ST
        • Then do sides of ST
      • Last do ST/TT lug, obtuse angle first (rotate jig)
        • Feed filler at TT, look for it to come out at ST

UBI Framebuilding Class - Day 4


5/14/2015 - Day 4

Fork Blade Jig

Brazing in the fork ends

Centering the Fork Crown

Brazing the Fork Crown

My Fork

Chainstay Overview Drawing & Choosing Chainstays
  • Measuring Fork Crown Blade Seat
    • Check catalog specs OR use the back side of the caliper to measure the blade socket depth
    • Measure each side in case they're different
    • Mark line across outside of fork crown
    • Measure to crown race seat
    • Mark on your drawing -- line perpendicular to HT between fork crown race seat and underside of fork crown/tire clearance
    • Draw 11/32-inch circle on frame drawing at front axle center
  • Fork Dropout Jig
    • Ensure symmetry in slot at dropout dummy axle
    • Position blades & dropouts in jig
    • May need to refile slots to adjust blade angle to get ovals parallel
    • Measure inside width of fork crown sockets (95.6mm)
    • Flip calipers over & measure outside width of fork blades at crown height
    • Check slot fit
    • Check blade ovals for parallel
  • Brazing fork dropouts
    • Use 2-4 inches of brass rod per dropout
    • Tack corner points first
    • Seal tab sides
    • Then fill plug
    • Braze one dropout, then the other
  • Chainstays
    • Overview drawing (see worksheet)
      • Dropouts
      • Tire Clearance
      • Figure out seatstay angle to help select dropouts (70°)
      • Chainstay length
      • Axle spacing
      • BB Shell width: 68mm
      • BB Shell diameter: 35mm for lugged
      • Axle to back of BB length (should equal CS length minus (35mm/2))
      • Draw overview on frame drawing
  • Choosing BB shell
    • Round vs. Oval chainstays
    • Seattube & downtube diameters
    • Tire clearance
    • BB edge to chainstays
    • Chainstay to dropout angle
      • Draw OLD of hub axle
      • Add 1/2 thickness of dropout -- watch for thick/raised dropout faces
      • Measure dropout tab length -- axle center to end of tab
      • Draw tab on drawing
      • Mark tab depth (6-8mm)
      • Mark slot depth (6-8mm)
      • Determine overall chainstay length
    • Draw in tire diameter
  • Choosing Chainstays
    • Straight vs. S-Bend
    • Round vs. Round-Oval-Round
  • Draw Line along Chainstay
  • Measure Chainstay Angle with Protractor
  • Chainstay Fixture
    • Dummy Axle
      • 137mm for 135mm OLD rear
      • 132mm for 130mm OLD rear
      • 122mm for 120mm OLD rear
      • 102mm for 100mm OLD front
    • Dummy axle slop -- keep in phase
    • Mark chainstay length for back of BB off of frame drawing
    • Check BB shell CS socket width with calipers
    • Mount stays & drops in chainstay fixture -- watch for any gaps at tabs
    • Adjust CS clamp fore/aft to set proper CS width at BB sockets
  • Fork Blades
    • Mark each fork blade length off drawing -- add 1mm to length
    • Cut to line -- ensure cut is perpendicular to blade
    • Clean up cut with flat file and level
    • Deburr inside and outside of cut blade
    • Check for square cut with machinist's square
  • Fork Crown
    • Mark left & right on crown for orientation and keep this orientation for fork leg insertion
    • Clamp blades in dummy wheel
    • Check alignment
    • Tweak as needed
    • Sight down through empty steerer hole in crown to check for center
    • Side with more rim clearance is the shorter side -- LIGHTLY file down other side 
    • Iterate to get alignment perfect
    • Squish oval ends of blades in vice as needed to fit crown
  • Fork Vent Holes
    • 1-2 inches above dropout; 1/16 inch hole only
    • 1-2 inches below fork crown; 1/16 inch hole only
    • Deburr any holes
    • When drilling, clamp dropouts, not fork blade
  • Brazing Fork Crown
    • Anvil Fork Jig
      • NOTE different offset scales for 1-inch and 1-1/8-inch steerer tubes
    • Sand & wipe down with alcohol
    • Check for close fit at fork crown tangs & points
    • Add Silver flux everywhere -- inside and outside of crown; use LOTS of flux
    • Fork blades should evenly touch alignment bar on jig
    • Use a hotter/bigger flame
    • Braze fork in jig upside down
    • Heat steerer tube first
    • Start at fork crown front and work around
    • Heat from top to bottom
    • Load silver on top (underside of crown) and pull it to bottom of crown (top side of crown)

UBI Framebuilding Class - Day 3


5/13/2015 - Day 3

UBI frame drawing

Bike Bits

Raking fork blades

UBI measuring fork offset

Paragon Fork Ends
  • Third Lug Practice
  • About Bike Frame Tubing
    • 9/6/9 Butted wall thicknesses
    • Butting lengths
    • Can see butt transitions inside a clean tube
    • Butted lengths vary widely, and can be asymmetric (one butted end is longer for trimming)
    • Seat Tubes
      • 28.6mm is most common, to fit a 27.2mm seat post
      • Single butted for lugged construction
      • Single-butted at bottom and EXTERNALLY butted at top for fillet-brazed construction
    • Choosing Frame Tubing Diameters
      • 1 inch steerer dictates 31.8mm head tube; be sure to choose an appropriate lug
      • 8/5/8 tubing is light
      • 9/6/9 is mid-range
      • 1/7/1 is heavy
      • Tubing choice factors
        • Rider weight
        • Rider strength
        • Cargo load
        • Frame size (larger frame implies stronger tubes)
      • Pick lugs first, since these might limit your tubing options
  • Frame Drawing
    • Work clockwise
    • Use a SHARP pencil for accuracy
    • Choosing the lower head lug is an iterative process due to unknown HT/DT angle
    • Drawing steps (refer to workbook)
      • Draw axle line about 7cm from bottom of paper
      • Draw BB drop
      • Draw seat tube centerline at correct angle from BB point and to desired length
      • Draw TT centerline to desired length
      • Draw HA/HT centerline back to axle line
      • Draw Fork Offset parallel to HT centerline
      • Draw arc set to radius appropriate to desired tire Bead Seat Diameter around front wheel axle center
      • Choose a fork crown
      • Consider caliper brake reach (if using caliper brakes)
      • Draw in perpendicular line for 13mm lower HS stack height
      • Measure lower head lug intercept
      • Draw in headtube width (31.8mm)
      • Add intercept distance
      • BB shell
        • For lugged, use the ID of the shell (typically 35mm)
        • For fillet, use the OD of the shell (measure shell)
    • Forks
      • Dropout styles
        • Tab style vs. socket style
        • Socket style has more limitations for fork blades due to requirement for matching diameters
      • Blade lengths
      • Blade thickness
      • Raking fork blades 
        • Check blade length before bending
        • Iterate/sneak up on desired rake, alternating between both blades
        • Get both blades as even as possible
      • Cutting fork blade dropout slots
        • 6-8mm depth is good rule
        • Clamp using wooden blocks
        • Sight down the bend/ridge of the blade to align the dropout slot
        • Make a Sharpie mark
        • Scribe width of dropout on blade parallel to sharpie mark, and centered with it
        • Scribe slot depth onto blade
        • Clamp and cut
        • Bias the slots inboard for extra hub clearance
        • Rotate the blade 90° and angle it to about 30° with floor
        • Use a large flat file to knock down the corners and bevel the edge
        • Use bevel protractor to gauge bevel against clamping blocks for repeatability with other fork blade
        • Clean out burrs with round file

UBI Framebuilding Class - Day 2


5/12/2015 - Day 2

Fillet Brazing Demo

Dropout slot practice

Dropout Practice

Dropout Practice
  • Fillet Brazing Demo
    • Deburr & clean joint
    • A Feedback workstand is especially good for brazing because the clamp allows you to adjust the tension loosely and rotate the work around for 360° access
    • Heat warps tubes -- especially at the end of a tube
    • Position joint 15-20mm from the end of a tube
    • Scotchbrite the brass filler rod to clean it
    • Tack on obtuse angle at the centerline
    • Tinning seals up the seam
    • Heat the steel to just barely orange
    • Leverage gravity to get the brass to move where you want it to
  • Second Lug Practice
  • How to read vernier calipers
  • Dropout Connections
    • Types
      • Socket & Plug-style dropouts limit which seat- or chain-stay tubes you can use, since the diameters must match
      • Tab-style dropouts are much more flexible -- nearly any tube diameter can work
    • Demo
      • Deburr inside of tube
      • Tab for dropout should be 6-8mm deep
      • Measure the ID of the tube (11mm)
      • Measure width of dropout tab (14mm)
      • 14mm - 11mm = 3mm / 2 = 1.5mm needs to be removed from each side of the tab to fit inside the tube
      • Scribe with caliper to show width of tab
      • Scribe depth on tab with caliper
      • Measure thickness of tab metal and scribe onto tube (5mm)
      • Use hacksaw to cut slot in tube; cut to inside of your scribe marks
      • Break chunks out with needle-nose pliers
      • Use warding file to clean up the slot
      • Clean up and align tab to slot
      • Clean out inside of tube with emery cloth wrapped around a round file
      • Cut tab to fit with hacksaw
      • Use large file to adjust tab fit; round the sides to mate with the tube ID
      • Clean tab with emery cloth
      • Clamp practice joint in vise, with tab pointing up
    • Brazing
      • Use brass flux and filler
      • Use a full stick of brass for this practice -- half a stick per dropout joint
      • Heat the tab mainly, then "brush" the torch downward onto the tube
      • Tack at the corners to prevent/protect from overheating
      • Seal the joint by flowing brass between the corners and around the outside edges of the tab
      • Move torch around to heat tab evenly
      • Fill up the gap on sides of tab to create a brass plug -- watch for shrinking as brass cools and solidifies
      • Add a nice fillet at the top to cap the joint
  • Bike Design
    • Measurements of rider
      • Inseam (865mm)
      • Torso Length (590mm)
      • Arm Length - From crease at wrist to shoulder joint (585mm)
    • Frame Design Parameters
      • ERD
      • Tires
      • Wheel diameter / Tire Radius
      • BB Drop
      • Seat Tube Angle (STA)
      • Seat Tube Length (STL)
      • Top Tube Length (TTL)
      • Head Tube Angle (HTA)
      • Fork Offset
      • Trail
      • Chainstay Length
      • Front Tire Clearance
      • Bridge/Crown brake reach
      • Lower Headset Stack Height (default value is 13mm)
      • Fork Height (axle to crown)
    • Homework
      • Frame dimensions & angles worksheet
      • Fork design & headset dimensions worksheet
      • Wheel & Tire dimensions

UBI Framebuilding Class - Day 1

5/11/2015 - Day 1

UBI Desk/Drafting Table

UBI Bench Area

My Bench.

Victor  Journeyman Oxy/Acet Torch Rig at UBI

Silver brazing Bottle Bosses

Lug practice: Fitting the "top tube" to the lug.

Silver Brazed Head Lug, Post Soak -- Left side

Silver Brazed Head Lug, Bisected
  • General info
    • Instructors: Joseph Ahearne & Dan Harrison
    • No eating/drinking at workbenches
    • Daily class checklist
    • QPB & Chris King orders
      • Cost + 15%
      • Orders needed by lunchtime on Friday
      • Can only buy things here while attending a UBI class
      • Check the online catalog
    • Kasai tubing catalog
    • Henry James catalog
    • No disk brakes on forks built in class
    • For fillet builders, you start on the main triangle first
    • For lugged builders, you start on the fork first
  • Jigs used in class
    • Henry James is used for lugged construction
    • Arctos is used for fillet construction
  • Torch Setup
    • Acetylene set to 5psi
    • O2 set to 10-12psi
    • Connections at regulator and valves are brass, so don't overtighten these!
    • Turn off Acet first, then O2
    • Bleed Acet from hoses first, then O2 -- this way the O2 pushes out any Acet left in the lines
  • Torch Flames
    • Reducing flame is used for Silver brazing ~ 1-2" secondary cone
    • Neutral flame is used for Brass brazing
      • Just a slight roaring sound
      • primary and secondary cones are equal length (they converge)
    • Oxidizing flame -- never want this
  • Flux
    • Blue flux for brass, thick consistency
    • White flux for silver, thin consistency & use a lot more than you think you need
    • Watch when the bubbles stop, which means you're near the working temp for the flux & filler
  • First demo & practice - Brazing water-bottle bosses
    • Drilling holes (#3/0.25" drill bit)
    • Use tubing block
    • Deburring
      • Deburring tool, move in clockwise direction only
      • Use half-round file inside the tube
    • Emory Cloth
    • Rubbing Alcohol to clean anything oily
    • Clean the silver filler wire with Scotchbrite pad
    • Heat the tube, not the H2O boss
    • "Paint" with the torch flame
  • Second practice - Lugs
    • Headtube/downtube lug: 60°
    • Headtube/toptube lug: 70° (start with this lug)
    • Seattube/toptube lug
  • Lug Prep
    • Never fit the tube to the lug, always fit the lug to the tube (e.g. never remove material from the tube, only the lug)
    • Remove burr from cut edge of tube with 2nd cut file
    • Lug should slide on tube under its own weight (loose fit)
    • Lug sockets are often oval due to casting process -- especially at thicker sections of casting since the cooling metal contracts more here
    • Choose a file that matches the lug socket radius
    • File in a criss-cross motion
    • Be careful not to over-file the lug's points
    • NOTE: Don't make the lugs loose on the tubes until after the tube is mitered!
  • Tube Mitering Demo
    • Push tube to meet the deepest points of the lug socket
    • Scribe lines on tube
    • Use metal snips or hacksaw to roughly trim the miter
      • Red snips - CCW / right-hand cut
      • Green snips - CW / left-hand cut
    • Position tube in block, aligning miter with block seam, clamp in bench vise
    • Try to file parallel to the floor, tilt the file slightly to bias material removal
    • Ensure the mating tube sits squarely and completely in the cut miter
      • If there are gaps at the sides of the valley, remove material from the bottom of the valley, possibly with a narrower file
      • If there are gaps at the bottom of the valley, remove material from the sides of the valley
      • Look for full contact around the perimeter of the miter
    • Use the lug to check the tube angle
  • Lug Brazing Demo
    • Applying Flux
      • 1/4" up inside of tube
      • All around the outside
      • Inside of lug completely
      • Make sure tube is seated at miter
      • 5mm excess headtube protruding from lug - gives a place for excess silver to flow onto
      • Flux outside of lug completely
      • Dry off flux with torch
    • Sequence
      • Wherever you add filler, the angle of the joint will pull tighter
      • NOTE: Always tack in plane to the frame
      • NOTE: Tack inside/obtuse angles on center first
      • Then tack on acute center line (other side of lug joint)
      • Finally go around right and then left side of lug to fill in with silver
      • The sequence is important because it keeps things centered and ensures the order of completeness -- silver penetration all around and through the lug
    • Flux should be evenly hot and clear on all joined surfaces -- watch for bubbles to stop coming out from the lug's edge
    • Don't heat any points on the lug directly, else they'll overheat
    • Tack just to the side of any lug points
    • Preheat where you want silver to flow

3/16/2015

Post-Surgery Pelican Ride Report

IF you've been following along on my Flickr stream, you'd know that earlier this year I did some surgery on my Box Dog Bikes Pelican -- I reconfigured and tuned the decaleur, and shortened the backstop on the front rack.


The big change here is the addition of a front brake cable hanger.  Previously I'd used a separate hanger, but I was having problems getting the headset tight enough due to having too many things to keep aligned at once.  I also did some lo-fi facing to the decaleur itself.


I shortened the rack's backstop by about an inch...just to make it easier to mount/remove the front bag.


And here's everything reassembled.  In the process the bike also got a different stem.  I'd originally installed a Nitto Technomic Deluxe, which ended up being too long in the quill, causing the stem's wedge to interfere with the butted portion of the steerer tube.  Getting the quill bolt tight enough was a challenge.  As I was reorganizing my parts horde, I discovered that I had an old Belleri 1000 stem that had the right extension length and clamp diameter, with a normal-length quill, so I swapped that out.


I finally was able to get out for a short ride this past weekend (I rode to Fairfax for coffee and a bit of lunch).  The bike worked fine, without any problems.  The headset stayed tight (although the real test will be some off-road riding), and the additional tightness of the V-O roller-bearing headset seemed to cancel any shimmy the bike exhibited before.


2/06/2015

New Bike Work Stand

I recently built this thing because I got really tired of constantly bending over while building racks and doing minor adjustments...


The core idea is simply to raise the bike up by about 24 inches.  Most of the time when I work on my bikes -- or when building cargo racks -- I don't actually need to remove the wheels.  I have a standard folding home work stand, but that doesn't hold the bike up as high as I'd like; also that doesn't give me a stable and known-horizontal base upon which to build a level cargo rack.  On this new rack, I can simply zero my digital angle gauge on the horizontal cross beam, and align everything else from that.

The rear section is hinged and drops down to allow spinning or removal of the rear wheel (e.g. derailleur adjustment).  The BB support is made of some 1/2-inch black pipe screwed to a mounting flange.  I discovered that some 5/8-inch threaded rod actually screws into the end of the black pipe, so a short piece of that gives me some vertical adjustment.

Someday, I might actually get out on a bike for a ride or something along those lines.  Maybe.

10/24/2014

Custom is Custom

I just picked up rack project #10 from the powdercoater.

Boom.

It's a 9x13" demi-porteur designed to fit on a Surly Big-Dummy fork.  It's pink (RAL 4010 to be specific) because that's the color the customer's daughter chose (she rides on the back of said Big Dummy).  Custom is custom!

I'm happy with how the rack turned out.  It's got some unique features, including an offset backstop to clear a Wald basket, six threaded bosses at the corners to bolt down the basket, and light wiring guides for right-side dyno power up and over to a left-side headlamp mount.  Also, since this particular bike uses disk brakes and the cantilever brake studs are unused, this rack bolts directly to the brake stud bases with chunky M10 socket-head bolts.  I had to hand-cut oversized rack tabs to accommodate that.